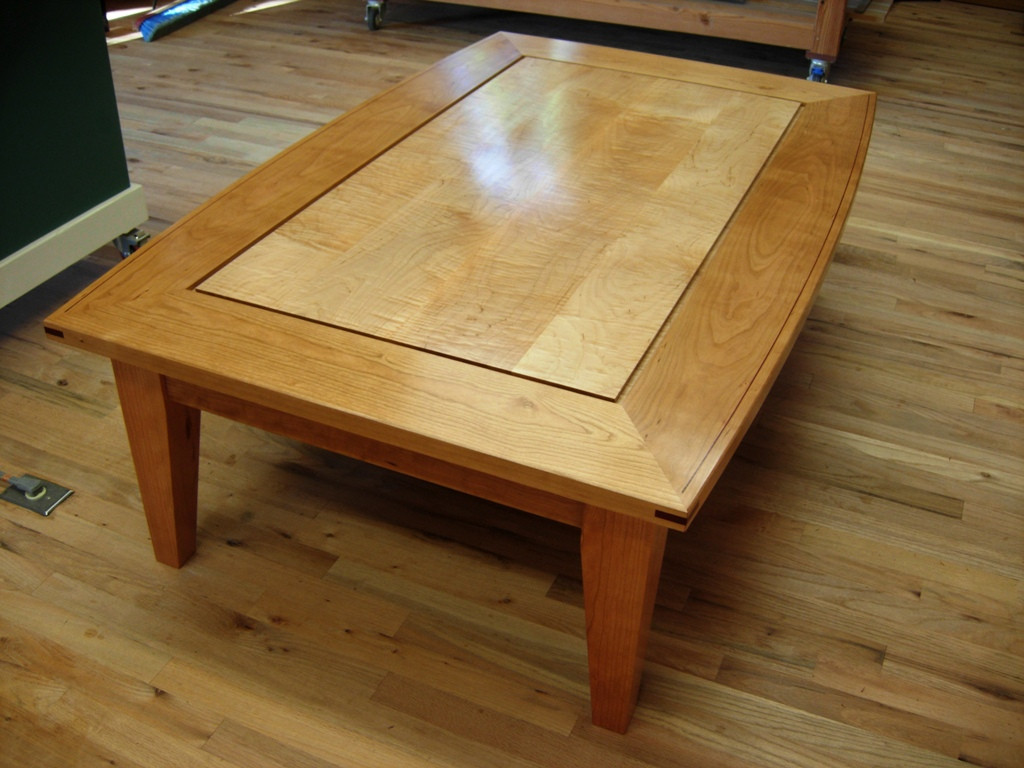
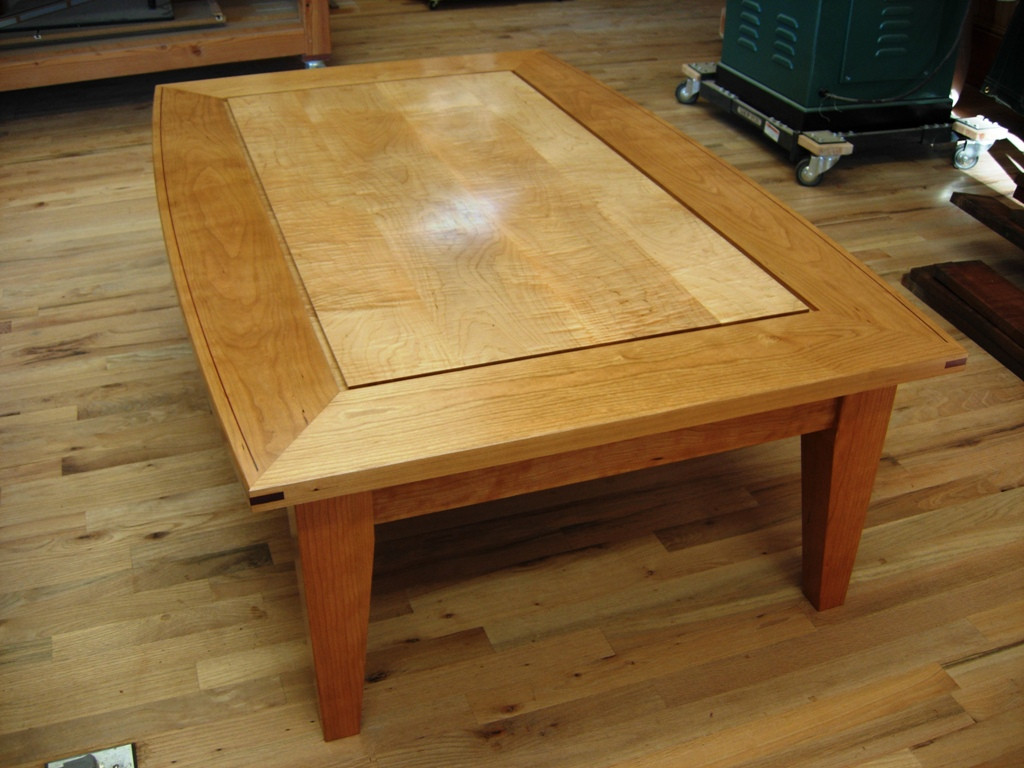
Here’s a table that I’ve recently completed. It’s for a friend who has a vacation home on the island of Martha’s Vineyard off the coast of Massachusetts. This will be the center piece surrounded by three love seats in the family room.
To match a few existing pieces in the home, I’ll be using cherry and curly (tiger) maple. The tapered legs and rails are cherry, the top is a cherry frame surrounding a large maple top. I will also add a few inlays. If you follow the chronology or blog entries below you can read about the construction details of what I actually did.
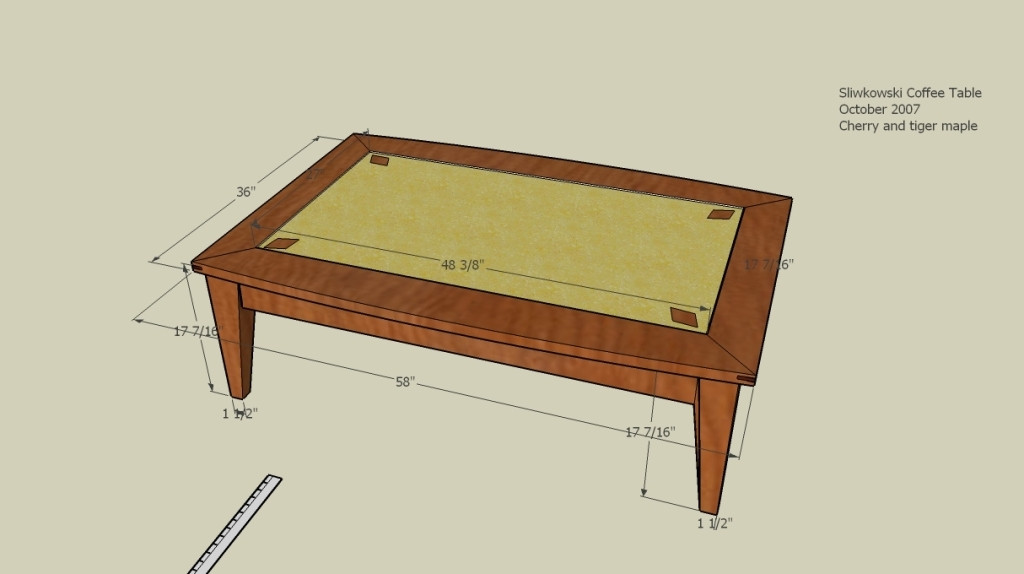
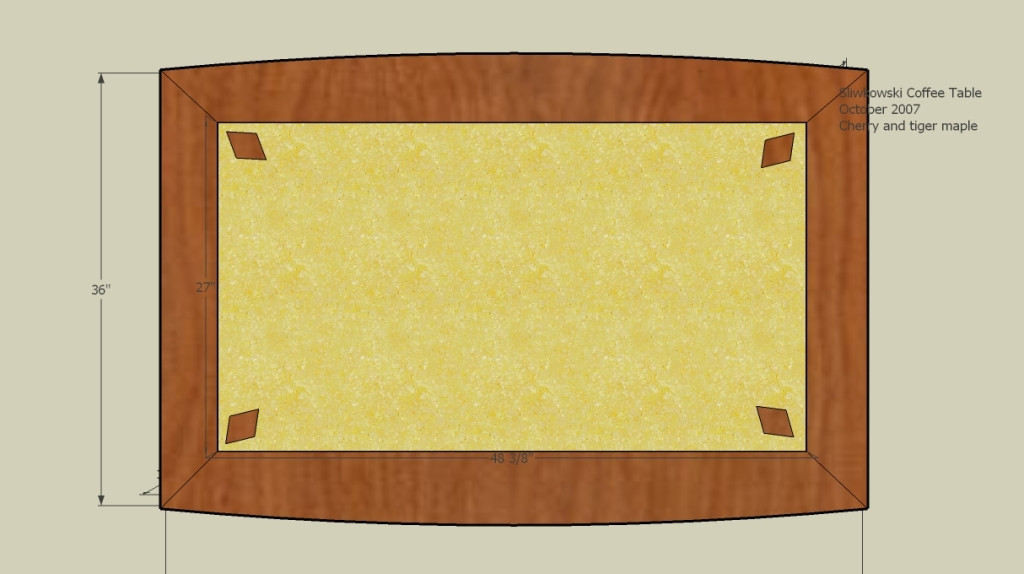
The diagrams are drawn in Google SketchUp. This is a 3D modeling software tool. In addition to these images. I’ve provided the Sketchup (.skp) file for download here.
You can download Google SketchUp here.
Cherry Coffee Table Gallery
November 23, 2008
The table is now complete, I applied the final varnish oil topcoat on Wednesday the 19th. It has a medium satin sheen. I like that finish look on cherry, it’s my favorite. See pictures at right. Over the weekend, I screwed the top to the base and called it a day. All in all, this project took me about 4 months to complete. Now I’m anxious to get it delivered to it’s owner before something happens to it, since he’s paid for it 🙂
November 10, 2008
Construction of the table is finally complete and I’ve moved to the finishing phase. I’ll finish the tabletop separately from the base, doing just makes the whole process much easier.
I will apply the finish is a series of layers. The first layer is just applied to the curly (also known as tiger) maple center panel of the top. I apply a very thin layer of tung oil. The oil helps of enhance the curl figure of the maple. I doesn’t take much, I use the oil full strength (no thinners) with a cotton cloth and rub hard. Then its 2 days drying time.
The next layer is blonde shellac which I spray on the entire piece. This creates an even base coat primarily for the cherry. On top of which I will apply a varnish oil (2 or 3 coats).
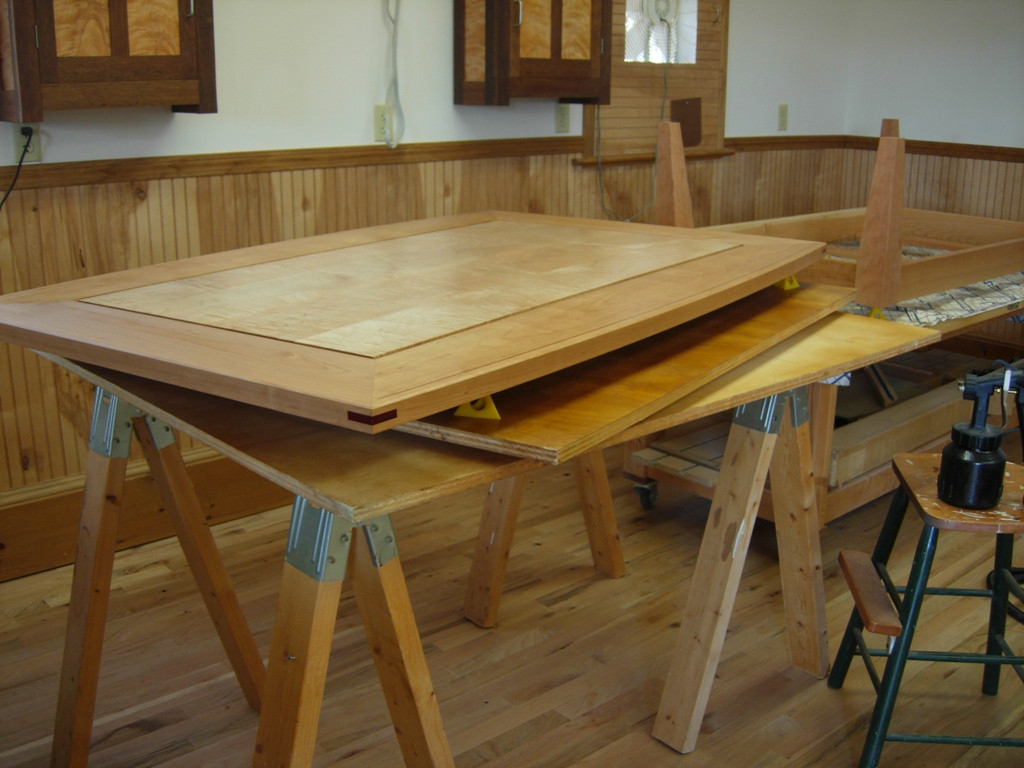
In the photo at right, you can see the tabletop sitting on what is basically a large lazy susan. This allows me to stand in one place and rotate the piece as I spray on the shellac. Instead of trying to walk around the piece tripping over the hose or electrical wires. So far I have applied the tung oil and shellac as described above. I should be able to apply the first coat of varnish oil soon.
November 3, 2008
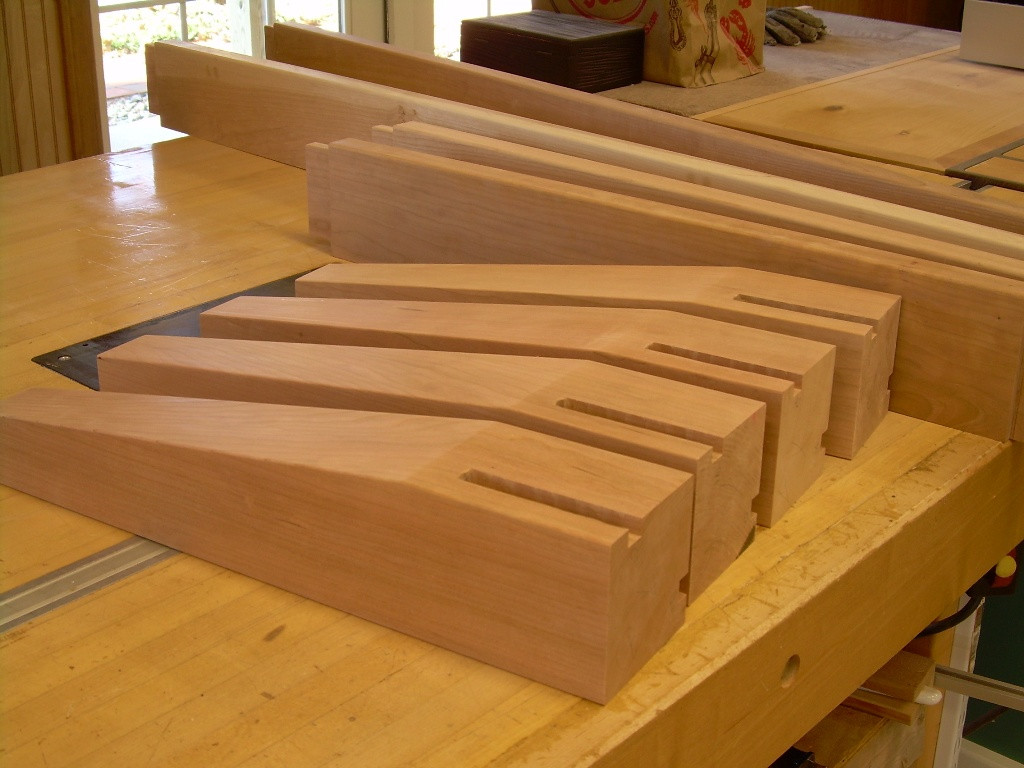
With the tabletop completed, I’ve begun work on the legs and rails. The legs, made of solid cherry are 3 3/8″ square and taper down to 1 3/4″ (on two sides). I snapped a quick photograph of them and the rails with the all the mortises and tenons cut. They’re nearly complete. All that’s left is assembly.
October 28, 2008
Now that the tabletop is glued up, I’ve begun all the detail mill work. That includes trimming off the bloodwood splines, cutting the curved (bowed) sides and the string inlay.
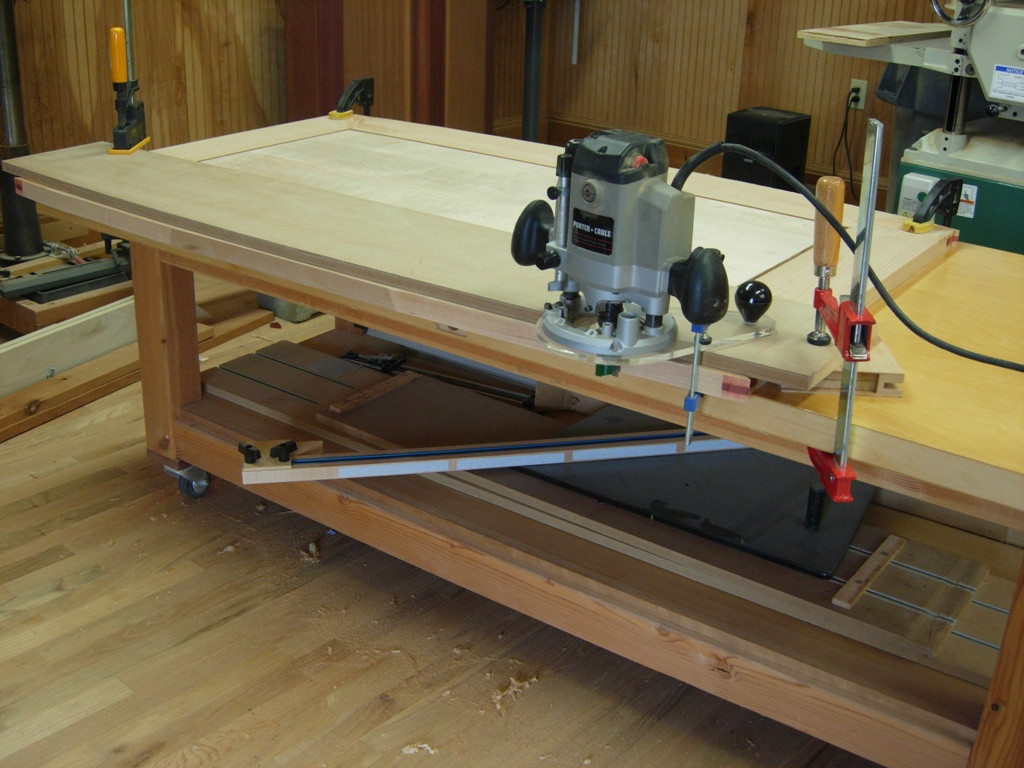
To cut a smooth uniform bow along the sides of the tabletop I first made a template that has the correct radius that I wanted for the sides. Along that 58″ length I wanted it to bow out 1 1/2″. That corresponds to about a 30 foot radius. I made a template out of 3/4″ MDF for the job. With my router attached to a long beam and working like a compass it was an easy task to cut a smooth uniform radius on the MDF template.
Clamping the template to the top I used a pattern bit in my router I cut the bow on the top. Additionally this cleaned up the corner bloodwood splines as well. You can see this in the photos at right.
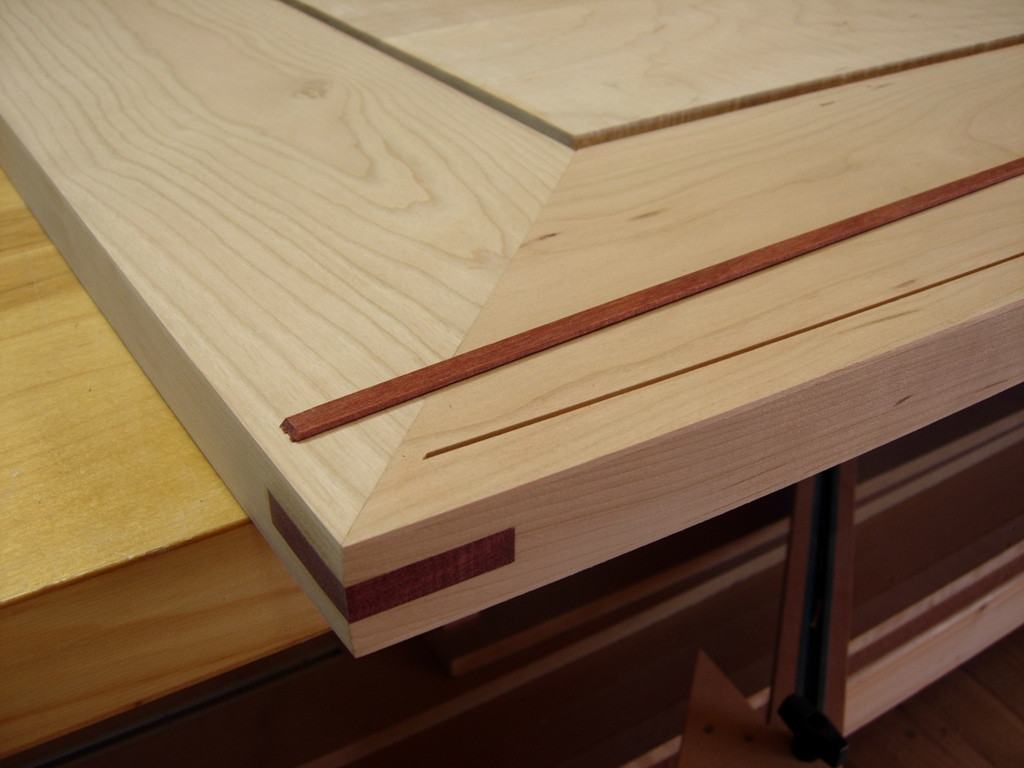
Next came the string inlay. I wanted to accentuate the bow along the sides of the top by using a string inlay of a contrasting wood. The inlay is just a narrow 1/16″ wide strip that follows the edge. This work first required routing a narrow groove just 1/16″ wide following the edge of the tabletop. The inlay strip is of a contrasting wood (bloodwood in this case), which is carefully glued into the groove. I took a photograph of the strip and the grove before the glue-up, which you can see in the photos at right. Additionally, the photograph shows the splines flush with the corners, the finshed look.
October 24, 2008
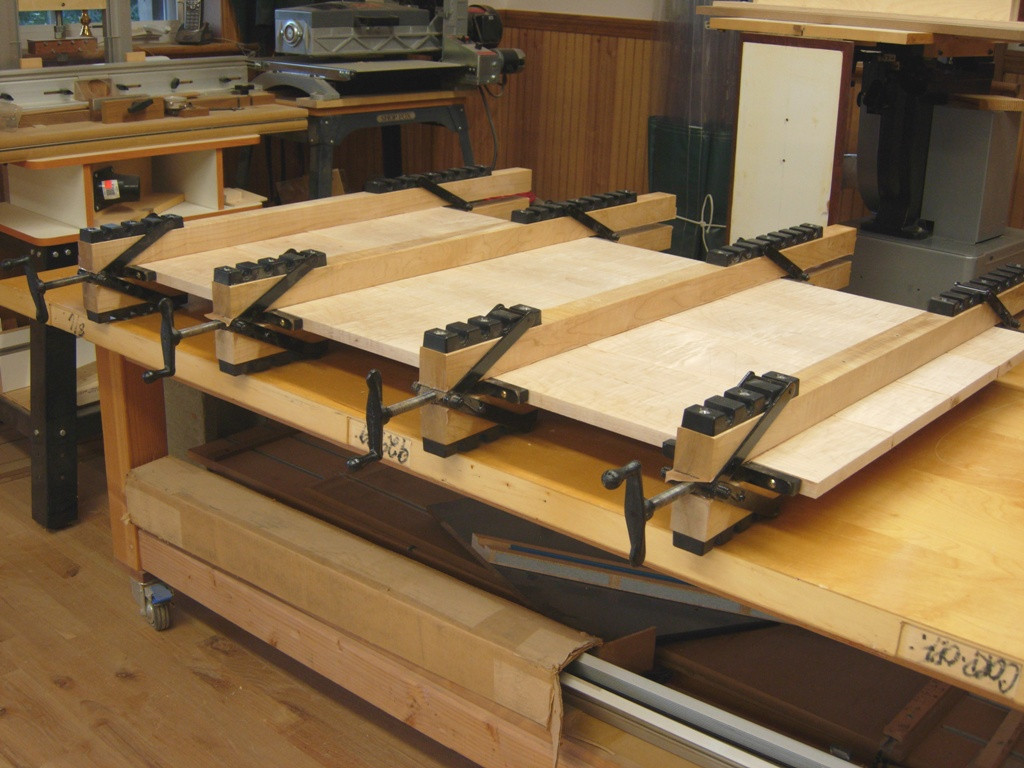
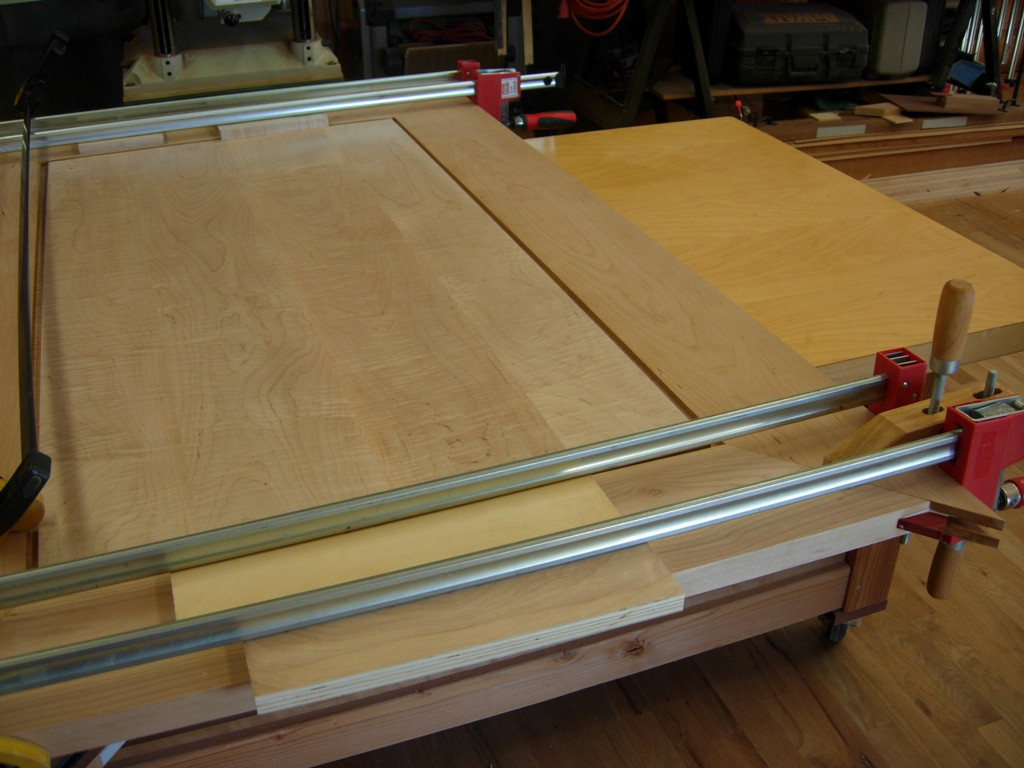
I’ve managed to get that large (58″ x 37″) tabletop glued up. I’ve added a few pictures of it while it’s still in the clamps. It takes a good deal of planning and forethought before starting the glue up process, you only get one chance to get-it-right. I do an initial dry-fit without glue to make sure every joint fits tight and I have all the necessary tools and clamps close at hand. Also, glue working-time is just minutes so you have to work fast to spread the glue on the joints and get the clamps on quickly. I do a couple of practice runs to ensure I’m truly prepared before I do the real thing.
As I’ve mentioned before each corner miter joint is secured with double (hidden) biscuits and a large exposed spline. You can see the spline in the close-up photograph at right. It’s made of bloodwood. It creates a nice contrast to the cherry. As present it’s still sticking out along the miters edge. Eventually, it will be flush with the corner providing both a visual accent to the cherry and a strong functional joint.
The center maple panel “floats” in the frame so it can expand and contract with seasonal humidity. Along it’s edge is a one inch wide lip (or rabbet in woodworking terms) that slides in a groove along the interior edge of the cherry frame.
Also, as you can see from the close-up photo one side of the corner miter is longer than the other. The long sides of the table will have a shallow curve, once I cut that curve it will bring the corners together. I plan to cut that curve next.
October 14, 2008
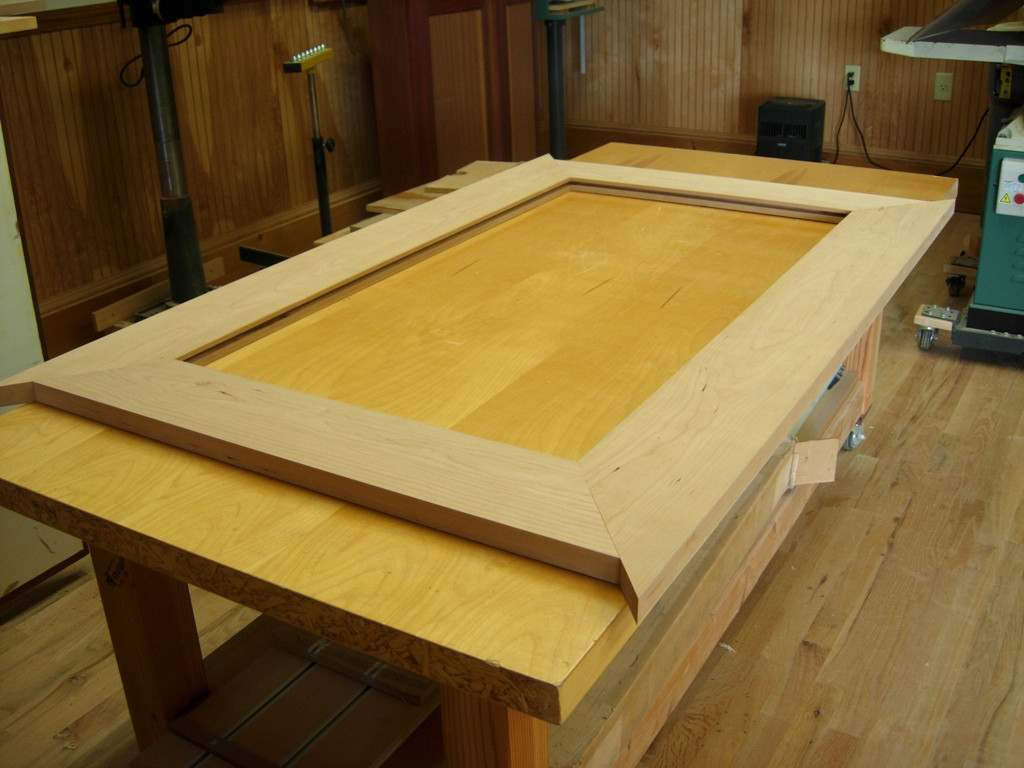
Over the Columbus day weekend I was able to cut the miters for the cherry frame of the top. You can see the details in the pictures at right. The long sides are wider than the ends because they will eventually have a nice curve or bow (see the sketchup image for an example). Because of this, the mitered corners are not your typical 45 degrees. It was a bit more difficult to figure out the angles but in the end it just took a bit more careful planning. Each corner joint has a double biscuit and single short dowel. These are really just to help align the joint when clamping. I added a close-up picture so the details are easy to see. The corners will also have a large exposed hardwood spline (of a contrasting wood). I have not done this yet. This is what will provide the structural integrity of the joint.
October 12, 2008
I have done plenty of work on this project, but I’ve not taken too many photographs until recently. This is primarily because even though I’ve done a good deal of work, I’ve not done any assembly as yet. As a result, it still looks more like a stack of lumber than a table. I’ve added a handful of pictures that mainly show construction details. This provides some insight into all the work necessary to make a stack of rough sawn lumber into a completed piece that will some day reside in a living room.
The top is made of both cherry and curly (tiger) maple as you can see from the sketchup images. I bought a single 8/4 (2″) thick maple plank to make the panel. I only needed 3/4″ thick boards for the panel, so I resawed it into enough boards to make the 25″ wide top. Starting with a single thick slab is a little more work, but it means a consistent grain pattern and color for that wide panel, a definite benefit for the overall success of the table. A couple of pictures show the panel glue-up then flattened with a hand plane.
Surrounding the maple panel is a cherry frame. The frame is about 6″ wide, each corner is mitered much like an oversized picture frame. The corner joint is about 8″ long, much longer than your typical picture frame. To maintain structural integrity it’s not possible to make this frame out of solid wood. Seasonal wood movement, which is more pronounced in wider boards would simply tear this joint apart within one year. Therefore the frame is cherry veneer. I resawed by own veneer 3/32″ thick. This thickness, about 10 times thicker than commerical veneers allows me to machine, sand, plane and otherwise work the veneered piece just like it was solid lumber. Yet it will not be prone to seasonal movement. One of the photographs shows one the frame pieces in a series of veneer presses. Another shot in an oversized tablesaw jig to cut the miter joints.
March 21, 2008
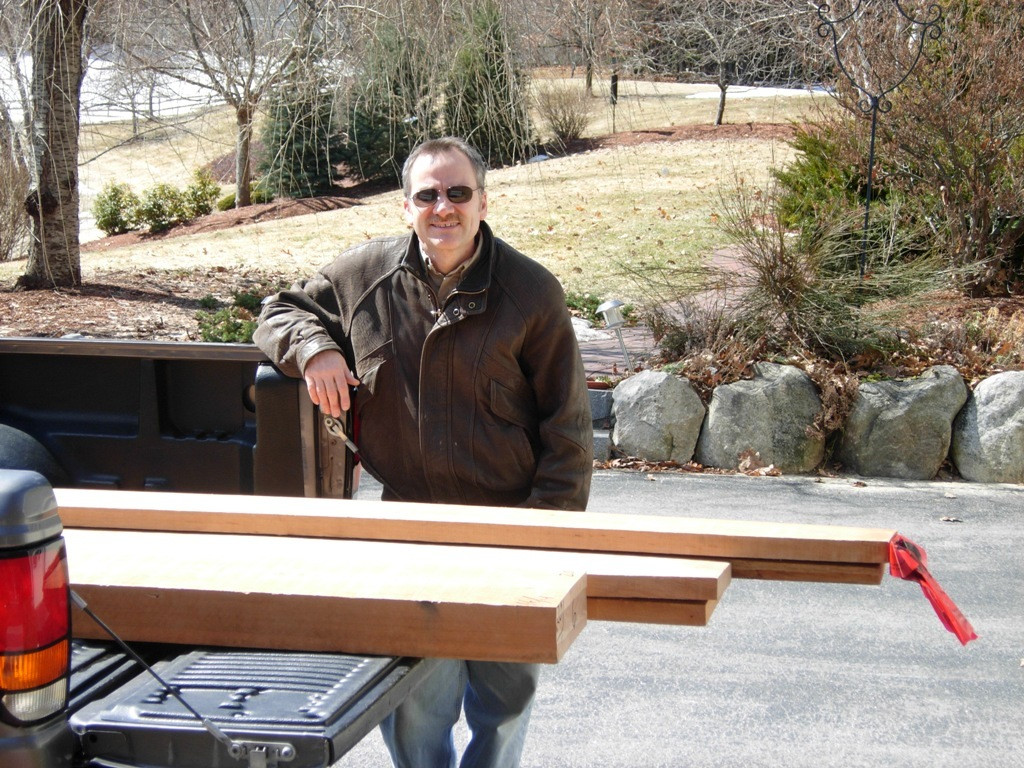
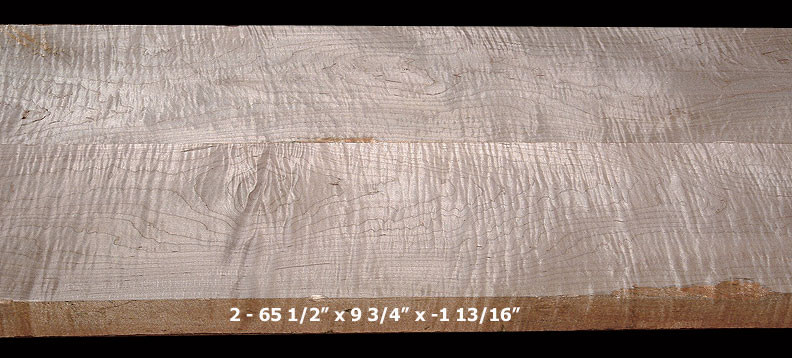
I’ve done a bit more planning for this project and purchased the lumber this week. As mentioned above, the table will be cherry and curly maple. I’ve added a few pictures of the lumber purchase; scroll down in picture list to the right to see the shots. That’s me standing next to my truck with the lumber in the back. The lumberyard is about 50 miles away. The place I visit has a great selection of domestic and exotic wood. For the top I bought 6/4 thick cherry boards, I’m planning on making the top about 1 1/8″ thick, this thickness will be proportional to the overall size of the top (60″ x 37″). The legs will be 3″ square tapering down to 1 1/2″, for that I purchased a big heavy piece of 16/4 material. As for the top’s center which is the curly (tiger) maple, I found a couple of matching pieces from a different lumberyard. I had them shipped in from Pennsylvania. In the pictures to the right, the maple boards are standing on edge in the stack of lumber in my shop. Look at the next picture to see the detail of the figure, nice stuff. For the top I need 4 pieces of that maple, each one about 7″ wide. I’ll be resawing the pieces to get the total width, this will have the added benefit of creating a nice matched set. I’ll write more later as this project get underway.
October 30, 2007
For this project, I decided to teach myself Google SketchUp. I can say that it was an exercise in frustration. I’m quite familar with Microsoft’s PowerPoint but this tool is quite different. However in the end, I’ve managed to master what I needed to draw furniture.
